 I hope all ya'll are as inspired to try something different.
Thursday, September 22, 2011
Feather me crazy!
 I hope all ya'll are as inspired to try something different.
Tuesday, September 20, 2011
I Scream, You Scream
We all scream for ICE CREAM! Summer is coming to an end, so I had to celebrate one last summer treat with my students. In Science, we have been studying about States of Change (solid, liquid, and gas). I remembered making ice cream in a bag during High School and knew it would be PERFECT! This was so easy, but the kids LOVED it and of course thought I was the coolest! We also made a mixture (a substance that can be separated) out of cheerios, pretzels, M & M’s, peanuts, and raisins. We even had cookies to show a chemical change!
Ice Cream in a Bag
1 gallon and quart size Ziploc bags
Ice (to fill half of the gallon bag)
Rock Salt
Chocolate Milk
1 teaspoon of sugar
1) Fill the gallon bag half way with ice and sprinkle with Rock salt.
2) Put quart size bag inside of the gallon bag and pour chocolate milk about half way.
3) Sprinkle 1 teaspoon of sugar into the milk.
4) Now it is time to SHAKE! You have to shake for about 5 to 10 mins. Of course this was the kids favorite part! Magically the LIQUID will turn into a SOLID!!
So easy and YUMMY! Check out some of the pictures on my school website (click pictures).
Sunday, September 18, 2011
Bubble Gum Machine
Friday, September 16, 2011
Friday Favorites
2) Click on the 1st result that appears i.e. Google Gravity
3) Wait 2 seconds. Something cool will happen!
4) Play with it for a while.
5) Then write any word in the Google search bar and press Enter.
6) Wait and see. Something even cooler will happen.
Thursday, September 15, 2011
Why did you start a blog in the first place?
Wednesday, September 14, 2011
I can't live without!
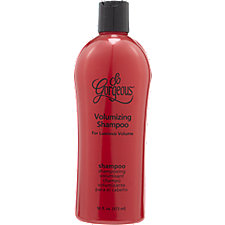
Best volumizing shampoo and the price is right.

 Garnier Anti-dark circle
Tuesday, September 13, 2011
Chair Redo

Since we have added on to the house, the color no longer went with the current décor. So what to do? Spray paint to the rescue!! Now I am very much a novice at spray painting furniture and I learned what not to do through this process. It ended up working out in the end.
Before:

I started off by removing a few screws to take off the seat.

I pulled the first layer of fabric off to reveal

This LOVELY fabric!

I did not have fabric, but I did have an old sweater that was a charcoal gray.

It looks like a mess from underneath! I basically just placed the seat between the sweater layers and started stapling. I later had to cut some holes to put the screws back in.

I originally wanted to spray it yellow, but the yellow I picked out was WAY too bright! I was going to use the chair in Andrew’s bathroom, but things changed. I had white spray at home, so I went with that. I know some of you are going to cringe, but I did not sand or prime. I just sprayed! Yes, it chipped some, but that was the look I was going for.

I wish I would have taken more pictures during the painting, but to be honest I was just trying to hurry! I was sweating bullets in the high 90 heat!
The AFTER!! I placed the chair in my entryway. A great place to put on shoes!


Say hello to my shabby dog Duncan!

What do you think?
-Robyn


